How I built my website using Notion for Free (with a Custom Domain)
How-To guide on creating a personal website free in 2023 with Notion.
Overview:
This guide walks you through setting up a free website using Notion with low to no code. The code used in this guide is all autogenerated and will only require you to copy and paste it.
There are 4 parts to this guide:
#1. Creating your public Notion page that will become your website.
#2. Configuring Cloudflare to rewrite traffic
#3. Customising & generating a script
#4. Adding your script to Cloudflare
Prerequisites:
A free Notion account.
A custom domain with a registrar (Hostinger offers domains starting at $0.99/year)
A free Cloudflare account.
Step 1: Create a page on Notion and “Publish to web”
Once you click “Publish to web”, ensure all options are the same as the screenshot below.
Notion has now made “Search engine indexing” a Notion Plus feature so we cannot get SEO on a free plan.
Step 2: Set up your Cloudflare account
Once you have signed up, you will have the option to “Add site”.
Enter your custom domain name here and click “Continue”.
Select the “Free” plan and “Continue”.
Cloudflare will try to import some DNS records. Here is the slightly tricky part if you have never dealt with DNS records.
If you don’t see any A records imported, add one with your root domain as the name and 1.1.1.1 as the content then click “Continue”.
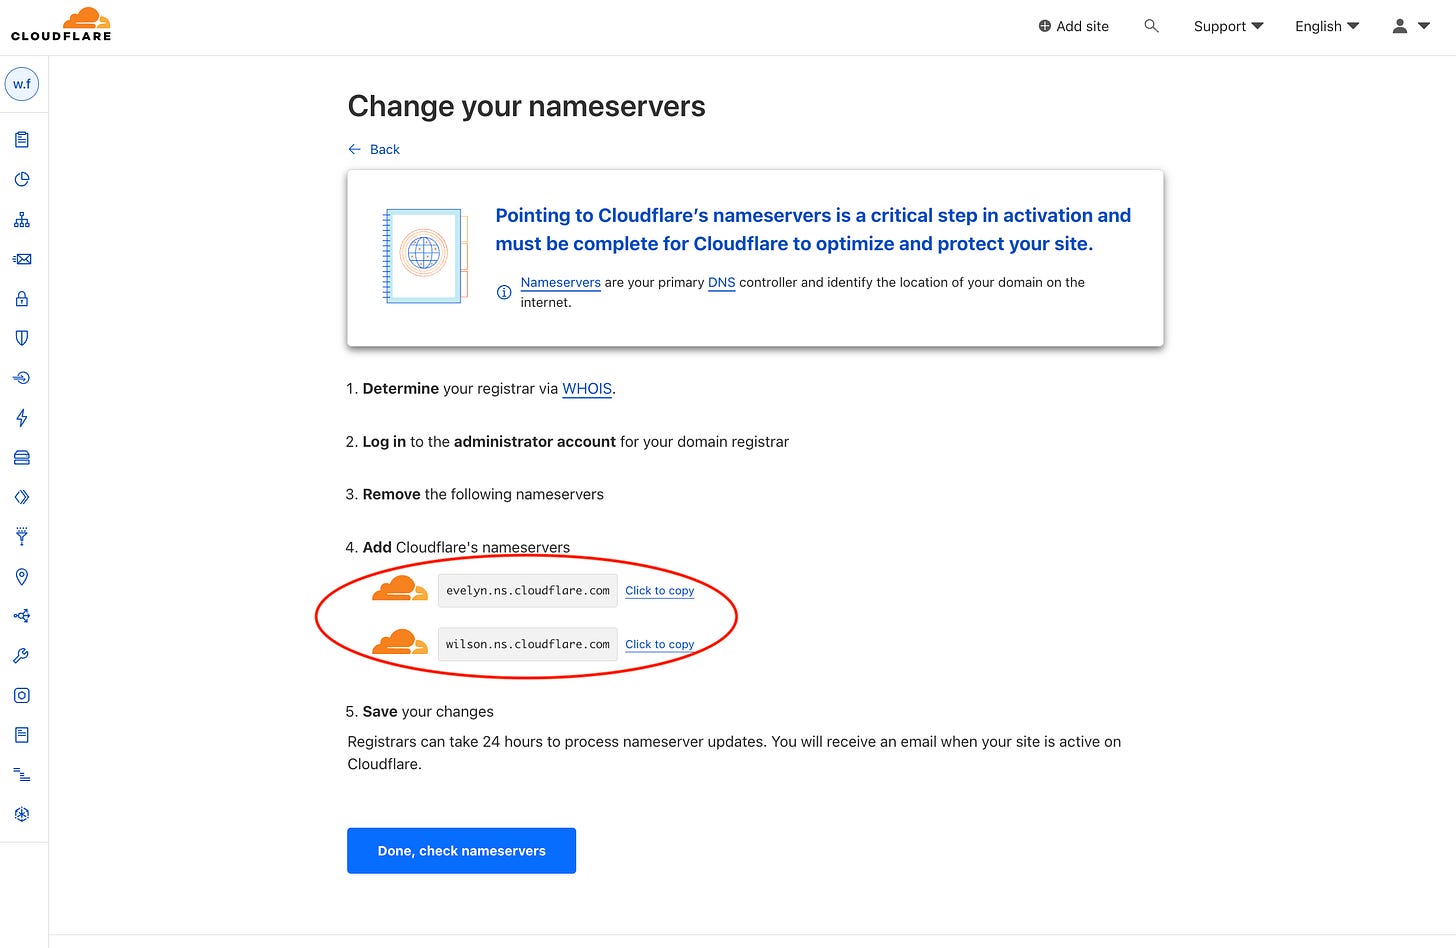
Copy the 2 nameservers that end in “.ns.cloudflare.com” and paste them into the domain settings page on your registrar’s website (Hostinger’s website - if you purchased your domain with them).
Wait for a few minutes before clicking “Done, check nameservers”.
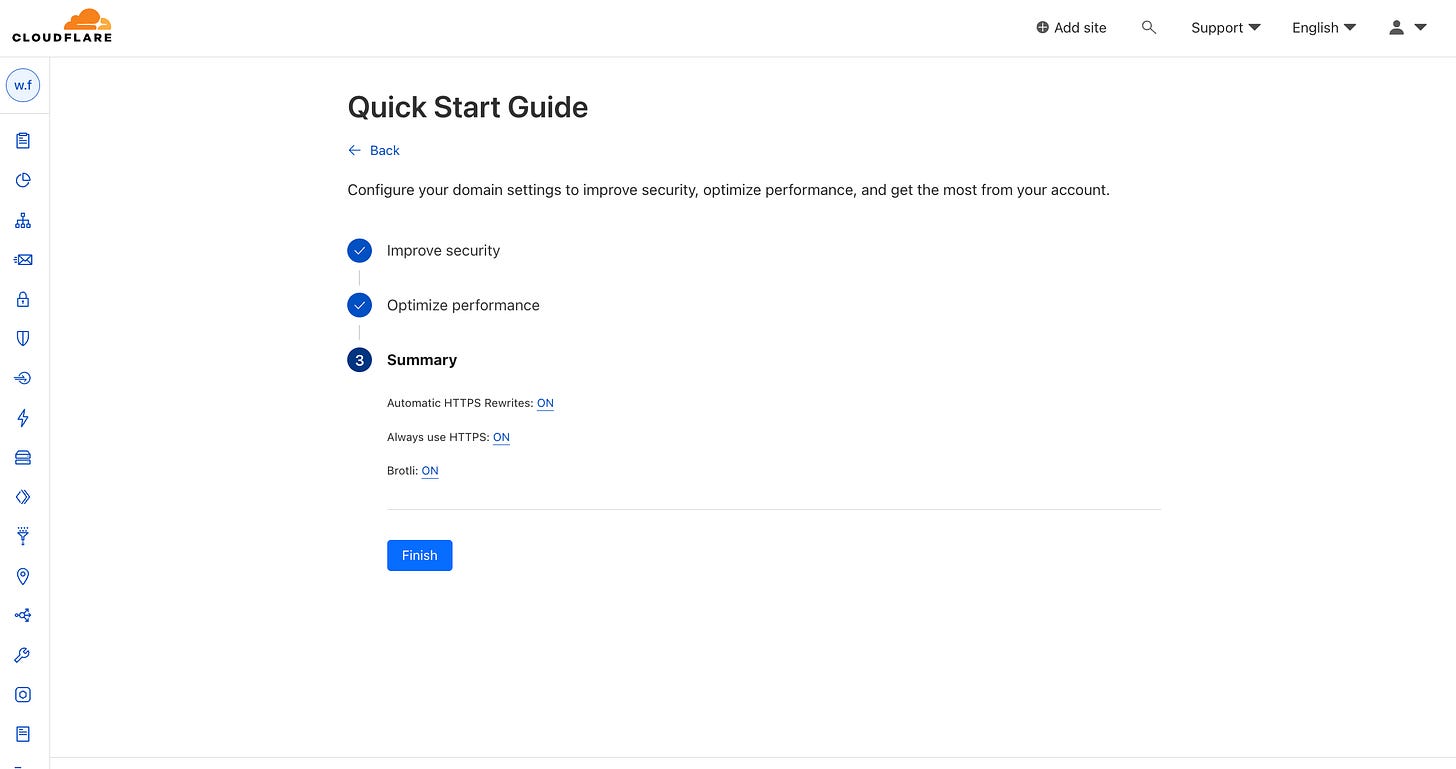
On the “Quick Start Guide”, switch ON every setting.
Select “Finish”. You should see a success screen if Cloudflare has detected your site. If not click “Re-check your site” and refresh the page. Nameserver updates usually take a while to reflect.
Select the “Workers Routes” tab and click the “Manage Workers” button.
Click “Create Application” and then “Create Worker”.
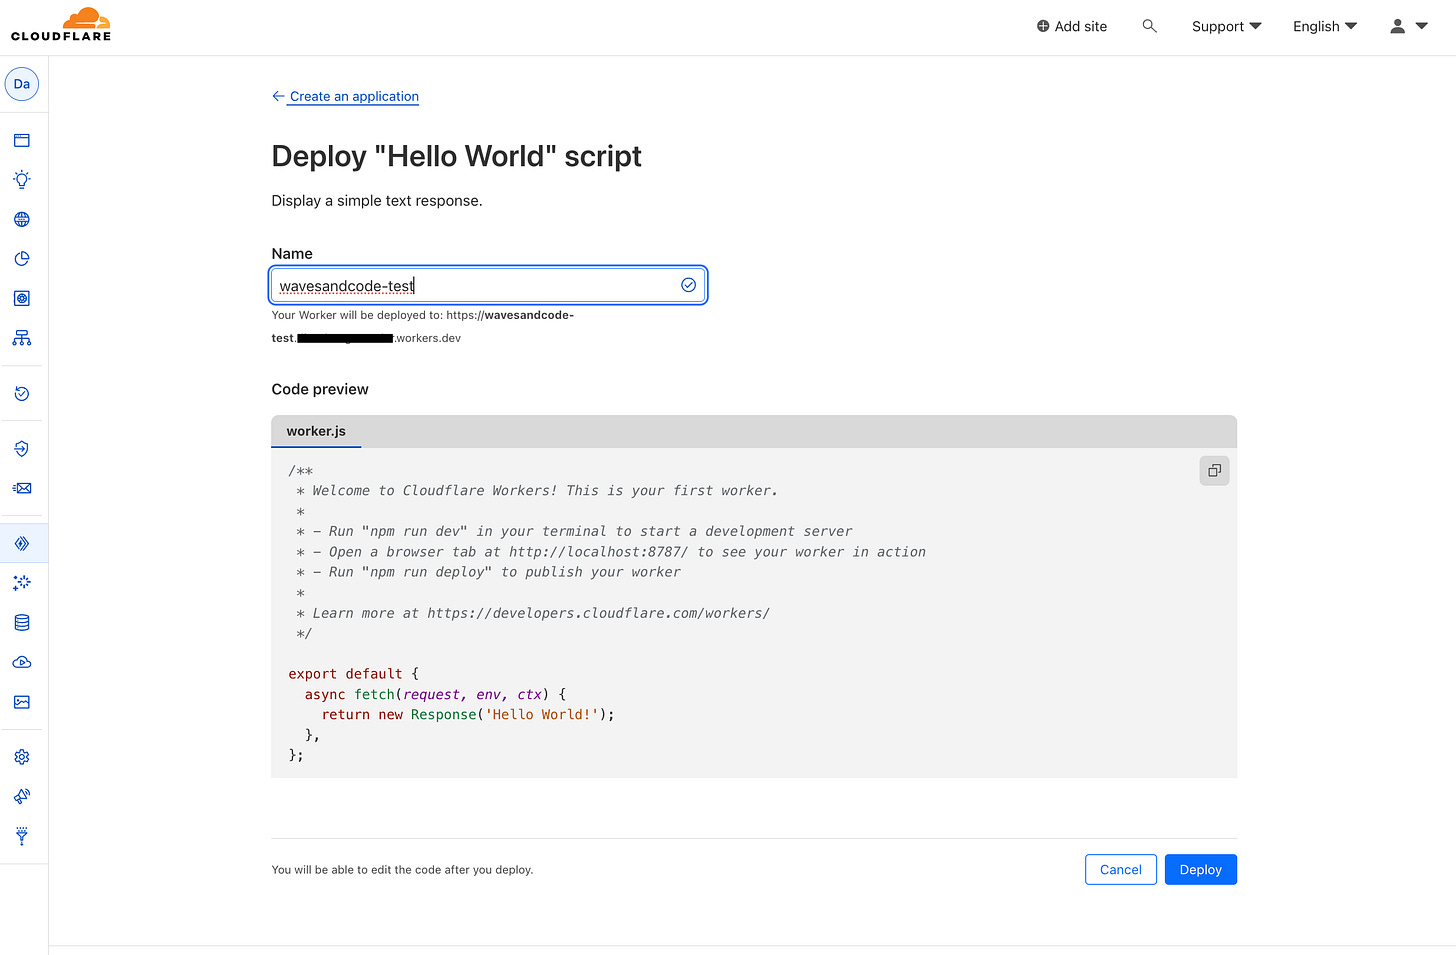
You will be shown a screen to name your worker. Choose any suitable name and click “Deploy”.
You will see a success message notifying you that the worker is deployed.
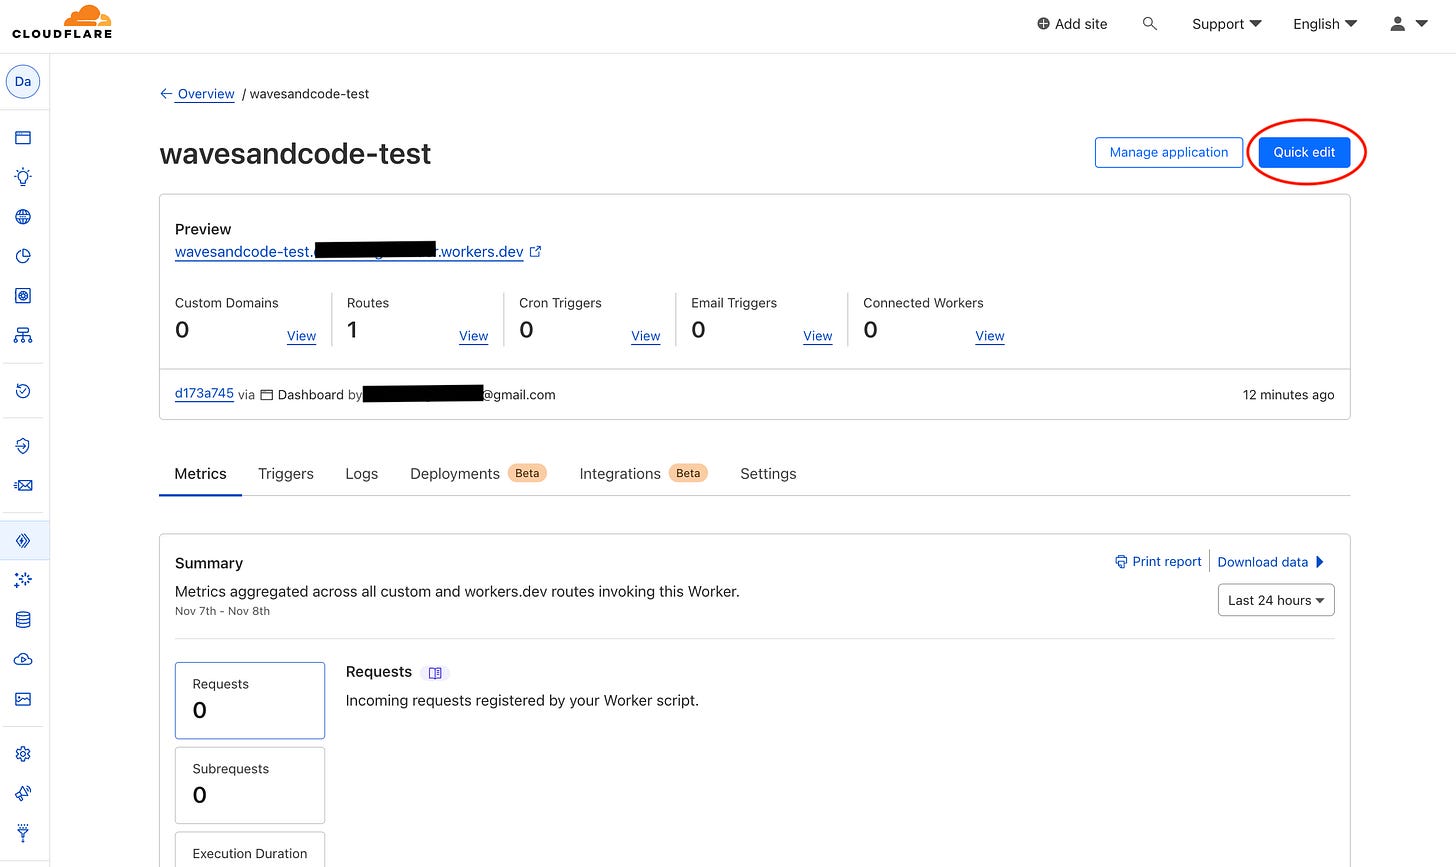
Return to “Manage Workers” and click on the worker name (wavesandcode-test).
Click “Quick Edit”.
This is where we will configure our worker after generating our script.
Step 3: Customise and generate the script for our worker
Fill in your domain, and your public Notion page URL then click “copy the code”.
Step 4: Add your script to the worker in Cloudflare
Delete the existing code and paste the copied code.
Click “Save and deploy”
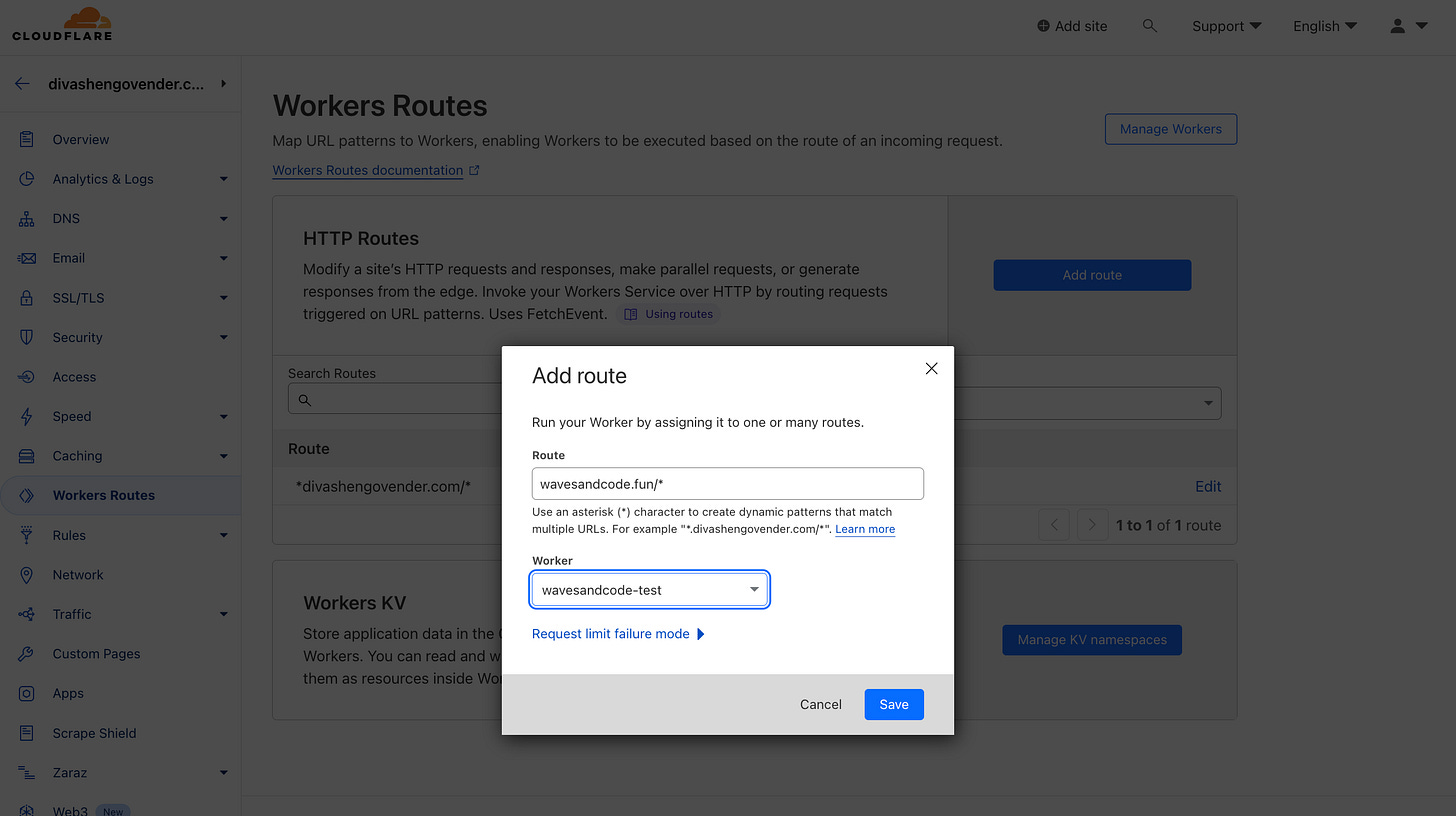
Return to the “Workers Routes” tab and click “Add Route”.
Type yourdomain.com/* as the “Route” and select the “Worker” you just created.
Hit “Save” and you are done! 🎉 Have a look at my personal website which was made in the same way → divashengovender.com.
Leave a comment if you have any difficulties setting up your website and I’ll be happy to help! Cloudflare UI has changed over the years so please comment on any errors.
This guide makes use of Fruition - A free, open-source toolkit for building websites with Notion.


